Technical Knowledge
How does a power trowel work
How does a concrete trowel work?
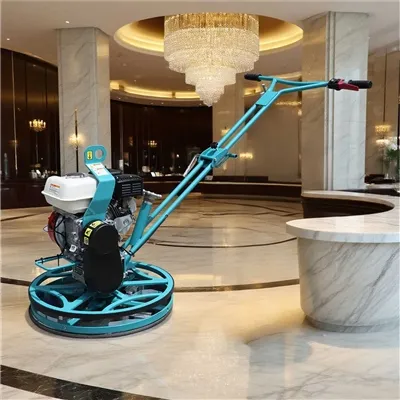
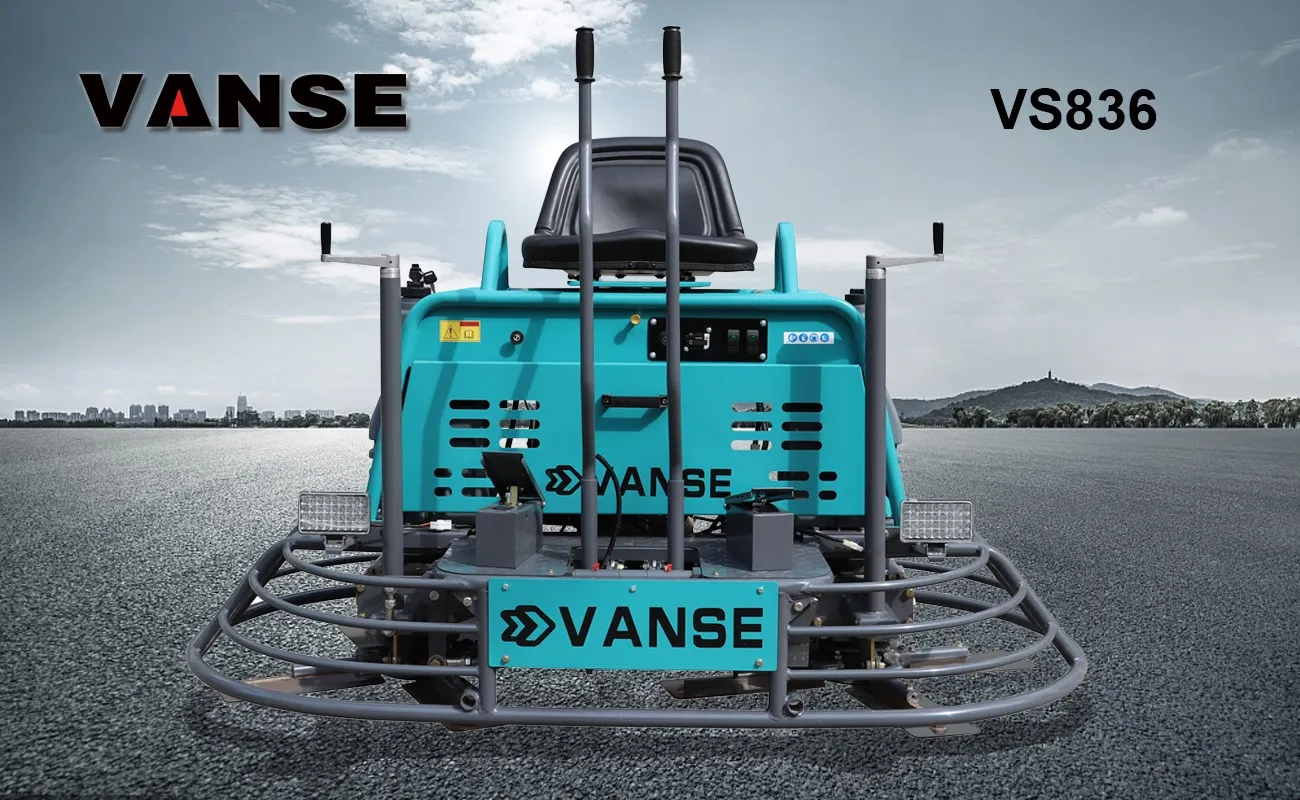
The working principle of the concrete trowel machine is mainly to drive the trowel device to rotate through the power device to smooth, compact and smooth the concrete surface.
Specifically, the motor or internal combustion engine provides power and transmits the power to the trowel device through the transmission system. The trowel device usually consists of a trowel blade and a connecting plate. The trowel blade contacts the concrete surface during rotation to smooth, compact and smooth it. Under the weight of the machine itself, the trowel is close to the ground to complete the compaction and smoothing operations.
In addition, some concrete trowel machines are also equipped with adjustable handles or joysticks so that the operator can adjust the height and angle of the trowel as needed, so as to better adapt to different construction environments and requirements.
Thanks to All the Friends Who Support and Trust Shandong Vanse Machinery Technology Co., Ltd.
If you want to know more about Shandong Vanse Machinery Technology Co., Ltd. or have any questions, please feel free to contact us:
Our Factory
Shandong Vanse Machinery Technology Co., Ltd.








Share this article

About the Author: Shandong Vanse Machinery Technology Co., Ltd.
Shandong Vanse Machinery Technology Co., Ltd. is a high-tech manufacturer specializing in concrete construction machinery, including laser screeds and related equipment. The company integrates R&D, production, and global sales, with products exported to over 60 countries and widely used in infrastructure projects worldwide.
Previous Post
Next Post
Related Articles
You Might Also Like
Key points for purchasing second-hand power trowel and common methods to avoid pitfalls
Selecting a second-hand polishing machine is a job that requires a lot of experience and skills. It can help you obtain a practical device at a lower cost, but if you make a wrong judgment, the subsequent maintenance and delayed construction period may cause you to lose more than you gain. The following is a detailed list of key points for choosing a second-hand polishing machine and common methods to avoid pitfalls. We hope it can be of great help to you. Fuselage structure Chassis (grinding disc) : This is the most crucial part. Check if it is flat and free of deformation. Slight wear and tear is normal, but if the wear is severe, there are pits or obvious deformation, it will lead to poor polishing effect and higher replacement cost. Blade (scraper) : Check if there is still sufficient thickness. If the metal substrate has been worn out, it needs to be replaced immediately, and this cost should be included in the cost. Protective cover: Check for any damage or severe deformation, as this is related to operational safety. Overall framework: Check for any signs of welding, cracks or repairs, which could be a sign of severe impact or drop. Engine (heart) Brand: Give priority to well-known brands such as Honda, Kohler, Briggs & Stratton, etc. Spare parts are easy to find and maintenance is convenient. Appearance: Check for any cracks in the engine casing, especially in the base and radiator sections. Check for obvious oil stains or carbon deposits. This might be a sign of oil leakage or poor maintenance. Air filter: You can ask to remove the air filter to have a look. If the inside is very dirty or even soaked with oil, it indicates that the previous owner might not have paid much attention to maintenance. Engine oil: You can pull out the oil dipstick to check. If the engine oil is black, viscous or contains metal debris, it indicates that the engine wear may be relatively severe and the maintenance condition is poor. Transmission system Gearbox: Check if there are any signs of oil leakage on the gearbox housing. Rotate the drive shaft by hand to feel if it is smooth, and if there is any jamming or abnormal noise. Belt/chain: Open the protective cover and check if the belt has cracks, wear or looseness. Check if the chain is loose and free of oil and rust. Be sure to ask the seller to start the machine for testing! Startup performance Cold start is the most illustrative. Observe whether the rope pulling is smooth and whether the machine can start smoothly within one to three rope pulls. If it is difficult to start, there may be problems (such as carburetors, spark plugs, insufficient compression, etc.). Engine sound After starting, listen to the sounds of the engine idling and accelerating. The operation should be smooth. A regular "tap-tap" sound is normal (valve sound). If there are loud "clicking" sounds, knocking sounds or irregular noises, it indicates that there is severe wear inside. Transmission system sound Let the trowel run idle and listen for any abnormal "clattering" sounds from the gearbox and transmission parts. The voice should be even and deep. Vibration condition When the machine is running, it should be smooth and the vibration should be within a reasonable range. If the vibration is abnormally severe, it may be due to deformation of the chassis, unbalanced installation of the blades or problems with the engine base Purchase time and source: Inquire about the specific year and channel of purchase of the machine to determine its service life. Usage frequency and scenarios: Is it for occasional household use or long-term high-intensity use by professional teams? The latter naturally wears out more severely. Maintenance and repair history: This is of Paramount importance. Has there been any major overhaul? (Such as engine cylinder opening, gearbox replacement When was the last time the engine oil, air filter and spark plugs were changed? Have there been any accidents (such as tipping over or collision)? A reliable seller will tell the truth, while a evasive one needs to be on guard. If possible, conduct a brief load test (such as grinding it on the ground). Observe after the load is applied: Whether the engine is prone to stall and whether the power is sufficient. Check for any slippage or abnormal noise in the transmission system. Whether the machine moves smoothly and if it deviates. Trap description: Merchants thoroughly clean and paint the machines to make their appearance look as good as new, thereby covering up internal wear and tear and malfunctions. Avoidance methods Pay special attention to the screws and interfaces: It is very difficult for a refurbished machine to have no signs of any screws being turned. Check whether there are any signs of wear on the engine fixing screws, chassis screws, etc. Paint surface consistency: The original factory paint surface is usually uniform. If you find that the paint color of some parts does not match the overall color or the paint layer is too thick, it might be due to later spraying. Don't judge a machine by its appearance: Don't be deceived by a clean exterior. The key is to check its operating status and internal wear. Trap description: The machine was once sold after its chassis and frame were deformed due to a fall or collision. It was sold after simple repairs. Avoidance methods Check the flatness: Place the machine on a flat ground and observe from the side whether the chassis is fully in contact with the ground and if there is any warping. Check the welding points: Carefully inspect each connection point of the rack to see if there are any irregular or rough welding points in the later stage. Running test: During no-load operation, observe whether the machine is stable and if there is any regular swinging. This might be a sign of an uneven chassis. Trap description: Piecing together a complete machine with "good" parts from different scrapped machines, which has poor compatibility and stability. Avoidance methods Brand consistency: Check whether the brand, model and newness of the main components such as the engine and fuselage match. Assembly machines often give the impression of being "mismatched". Check the nameplate: Whether the information on the body nameplate (such as model and production date) is consistent with the seller's description. Poor comprehensive operation: When the assembly machine is in operation, various minor problems may occur frequently, making it feel "not smooth". Trap description: The machine performs okay when it is cold or unloaded, but once it is heated up or loaded, problems become apparent (such as insufficient power, severe abnormal noises, and engine stalling). Avoidance methods Persist in long-term testing: Let the machine run for 10 to 15 minutes and observe whether the state is stable after warming up. Load testing is required: This is the best way to verify the true state of the machine. Check the engine oil: After warming up the machine, stop it immediately and check the engine oil. If there are many small bubbles (emulsions) in the engine oil, it might be that the cylinder gasket is being washed away, which is a big problem. Before deciding to purchase, quickly check the following list: Inspection items Qualification standard Be cautious/give up Fuselage chassis Smooth, evenly worn, and without deformation Deformation, cracks, wear limit Engine Well-known brand, smooth start-up, stable operation, pure sound, no oil leakage Difficult to start, severe abnormal noise, oil leakage, and heavy smoke Transmission system The rotation is smooth without any abnormal noise, and the belt/chain is not aged There is abnormal noise, jamming and oil leakage Seller Description Be honest, answer all questions, and keep clear maintenance records Vague and evasive, concealing history Price In line with market conditions (approximately 30% to 50% of a new model) Far below the market price (" There's no such thing as a free lunch ") Test run situation The hot and cold units start well and operate stably under no-load or load conditions Any test is unqualified Final suggestion: If possible, bring along an experienced master craftsman or mechanic. Their experience can help you discover many problems that beginners fail to notice. When making a purchase, it is best to sign a simple written agreement with the seller, clearly stating the condition of the machine, and keep the payment voucher for unexpected needs. Remember, the primary principle when purchasing second-hand equipment is "It's better to miss out than to buy wrongly." Wish you could find a sturdy and durable good machine! Note: The parameters provided in this document are for reference only and are not mandatory. Due to differences in technical characteristics between different brands and models of laser levelers, please consult the manufacturer for a suitable solution before actual operation. This reference document assumes no responsibility for any issues arising from failure to follow the manufacturer's instructions.How to maintain the hydraulic system of concrete laser leveling machine
This is the most basic and crucial step, enabling early detection of potential problems. Visual Inspection: Lake Check: Carefully inspect all hydraulic hoses, joints, cylinders, valve blocks, and hydraulic pump/motor surfaces for oil stains. Any leaks, even minor ones, must be addressed immediately. Oil Level Check: With the machine parked on a level surface and the hydraulic cylinders in their original positions, check the oil level gauge on the hydraulic oil tank. The oil level should remain between the upper and lower marks on the dipstick. A low oil level can cause the pump to suffocate, seriously damaging it; an excessively high oil level can cause the oil temperature to rise abnormally. Oil Temperature Check: After a period of operation, feel the oil tank wall to feel its temperature. Normal oil temperatures are generally between 30-60°C. If the oil temperature is too hot (over 70-80°C), the system is overheating and requires shutdown and inspection. Cleanliness Check: Inspect the area around the oil tank filler neck and the breather (air filter) for dust and debris to ensure they are clean. Audory Check: When starting the machine and operating hydraulic mechanisms, listen carefully for unusual noises from the hydraulic pump, such as clicking (cavitation) or high-frequency hissing. Unusual noises often indicate pump damage or cavitation. Operational Feel Check: Operate the various handles to feel the smooth and powerful movements of the screed, including lifting, traveling, and so on. Check for any sluggishness, weakness, jerking, or crawling. Please refer to the specified maintenance schedule in your equipment's Operation and Maintenance Manual. The following are general recommendations. Maintenance Items Recommended Maintenance Cycles Detailed Instructions and Precautions Replace hydraulic oil First Maintenance: 500 hours Subsequent Maintenance: Every 2000 hours or annually (whichever comes first) Important! New oil does not equal clean oil. Keep the oil clean. 1. Drain the oil while it's hot: After operation, drain the old oil immediately while it's still hot. 2. Clean the oil tank: Thoroughly clean the inside of the tank, the magnetic rod, and the baffles with a clean silk cloth or special wipes. Never use cotton wool! 3. Replace all filter elements simultaneously: See the next item. Replace hydraulic filter Suction Filter: Clean (with every oil change) Return/Pressure Line Filter: Must be replaced with every oil change 1. The filter element is the "kidney" of the hydraulic system and must not be used beyond its expiration date. 2. Even if it doesn't appear dirty, its filtering performance may have deteriorated. 3. When replacing the filter element, ensure that the model and accuracy are exactly as specified by the manufacturer. Do not use inferior filter elements. Clean air filter (breather) Every 250 hours or monthly Remove the breather and blow it clean from the inside out with compressed air. If the environment is dusty, clean it more frequently. Damaged or excessively dirty oil should be replaced immediately. Check hydraulic oil quality Before every oil change or monthly Three Looks and One Smell Method: Look at the color: New oil is usually light yellow and transparent. If it becomes darker or blacker, it indicates oxidation and deterioration. Check for odor: A strong burnt odor indicates severe overheating and oxidation of the oil. Check for impurities: Place a drop of oil on filter paper and let it sit for a while to see if there are any visible particles forming. Check for viscosity: Rub the oil between your fingers; if it feels too thin or too thick, it's abnormal. Check the viscosity: Rub it with your fingers, if it feels too thin or too thick, it is abnormal. Tighten and clean the system Every 500 hours When the machine is stopped, check and tighten all pipe joints and flange bolts. Note: Do not tighten while the system is under pressure. Keep the entire hydraulic system clean and prevent dust from entering. Symptoms Possible Causes Troubleshooting and Solutions Leveling is slow and weak 1. Hydraulic oil level too low 1. Check the oil level 2. Hydraulic filter clogged 2. Check the filter element for differential pressure alarms or replace it immediately 3. Severe internal leakage in the hydraulic pump, resulting in reduced efficiency 3. Have a professional service technician check the pump's volumetric efficiency 4. Relief valve (pressure valve) set pressure too low or faulty 4. Have a professional technician check and adjust the system pressure System noise is high, pump makes unusual noises 1. Air in the suction line or clogged (most common) 1. Check the suction filter and fittings for tightness 2. Hydraulic oil viscosity too high (low oil temperature or incorrect oil grade) 2. Preheat the hydraulic oil or replace with the specified brand 3. Damage to hydraulic pump bearings or internal components 3. Repair or replace the hydraulic pump Oil temperature is too high 1. Improper hydraulic oil level (too high or too low) 1. Check the oil level 2. Severe internal leakage in the hydraulic system, resulting in significant energy loss 2. Check the pump, valves, and cylinder for internal leaks 3. Relief valve set pressure too high or permanently open 3. Adjust or repair the relief valve 4. Cooler (if present) clogged or fan not rotating 4. Clean the cooler and check the fan circuit Cylinder experiences creeping or vibrations 1. Air in the hydraulic system 1. Perform multiple full strokes to vent air 2. Worn or damaged seals inside the cylinder 2. Check the cylinder and replace the seals 3. Oil contamination, causing valve core to stick 3. Replace the hydraulic oil and filter element and clean the system Oil selection: You must use the anti-wear hydraulic oil of the brand and viscosity grade recommended by the equipment manufacturer. It is strictly forbidden to mix hydraulic oils of different brands and grades. Maintaining Cleanliness: The core of hydraulic system maintenance is preventing contamination. When disassembling, refueling, or replacing filters, ensure the cleanliness of the operating environment, tools, and hands. The saying "a speck of dust can destroy a precision hydraulic pump" is true. Bleeding: After changing the hydraulic oil or performing repairs, the system must be thoroughly bled. This typically requires operating each cylinder multiple times under no-load conditions to expel the air back into the tank. Professional Repair: For work such as pressure adjustment, disassembly of the hydraulic pump and motor, and repair of major valve blocks, it is strongly recommended that trained professional technicians or the manufacturer's after-sales service be performed. Improper adjustment and disassembly can result in more serious damage. Maintaining the hydraulic system of a concrete laser leveling machine requires careful daily observation and regular, standardized maintenance. By adhering to the principles of "clean oil, unobstructed filtration, appropriate flow rates, and rigorous operation," you can greatly ensure the stability and service life of the equipment, providing reliable support for your construction projects. ARMOUR JOINT CONCRETE LASER LEVELING MACHINE POWER TROWEL SLIPFORM MACHINE STEEL FIBER TOPPING SPREADERCan concrete polishing machines replace power trowels for achieving mirror-finish super flat floors?
The short answer is yes, a concrete polishing machine can replace a power trowel, but only if you are starting from an already hard and cured slab. For achieving a mirror finish on new super flat floors, these two machines are not interchangeable; they are sequential partners in a two-stage process . To understand why, you have to look at when in the concrete's life cycle each machine operates. A power trowel works on wet, setting concrete, while a polishing machine works on hard, cured concrete. Feature Power Trowel (Finishing Stage) Concrete Polisher (Hardening Stage) When to Use During the concrete's initial set (while still plastic/hardening) . After the concrete has fully cured (typically 28+ days) . How it Works Uses steel blades to float, compact, and "burnish" the surface paste, creating a temporary mechanical shine . Uses abrasive diamond pads to physically grind down the surface, exposing the aggregate and creating a permanent structural shine . Result Creates the initial dense, smooth surface required before any polishing can happen. This is the foundation. Removes the top layer to achieve the final desired gloss level (from satin to mirror). This is the final art. Goal Densification & Profile Creation. To prepare a flat, cured slab ready for polishing. Aesthetics & Durability. To reveal the aggregate and create a long-lasting, high-gloss finish . Think of it like building a piece of fine furniture. You cannot start with a rough log and immediately apply varnish. You need a plane to make it flat first. The power trowel's job is to create a perfectly flat and dense foundation. As we discussed in your previous question about operation time, the trowel burnishes the surface. If you try to use a polishing machine on a floor that hasn't been properly power-troweled, the slab will be too rough and uneven. The polisher would have to remove far too much material to achieve flatness, which is inefficient and costly . Once the concrete is cured, the polishing machine takes over. You attach diamond abrasive pads (starting coarse and moving to very fine, like 3,000 grit) . This process physically cuts the surface, revealing the inner beauty of the stone and creating a shine that is part of the material itself, not just a surface effect . Technically, yes, a power trowel can be converted into a high-speed polishing machine, but this is for the polishing phase only. The Conversion: You can buy a conversion kit (planetary grinding heads) that attaches to the bottom of a power trowel, allowing it to hold diamond polishing pads . The Advantage: This is incredibly fast. A converted ride-on power trowel can polish over 10,000 square feet a day, making it ideal for massive warehouses . The Trade-off: A converted trowel is less precise than a dedicated planetary grinder and cannot get close to walls or into corners. You would still need a smaller, walk-behind grinder for the edges . Regardless of which machine you use for polishing, you must apply a chemical hardener called a densifier (usually lithium silicate) after the initial grinding passes . This chemical reacts with the concrete to make it rock-hard, allowing it to accept a high-gloss polish. Without it, the surface will remain chalky and dull. In short: Use the power trowel to build the perfect canvas. Then, bring in the polisher to create the artwork. If you are planning a project, knowing the desired final gloss level (e.g., matte, satin, or high-gloss mirror) will help determine exactly which grit progression you need for the polishing phase. Let me know if you'd like more details on that. Contact us NOW Note: The parameters provided in this document are for reference only and are not mandatory. Due to differences in technical characteristics between different brands and models of laser levelers, please consult the manufacturer for a suitable solution before actual operation. This reference document assumes no responsibility for any issues arising from failure to follow the manufacturer's instructions.